Build an Expense Tracker With Next.js, TypeScript, Prisma, Neon & Clerk
Jun 25, 2024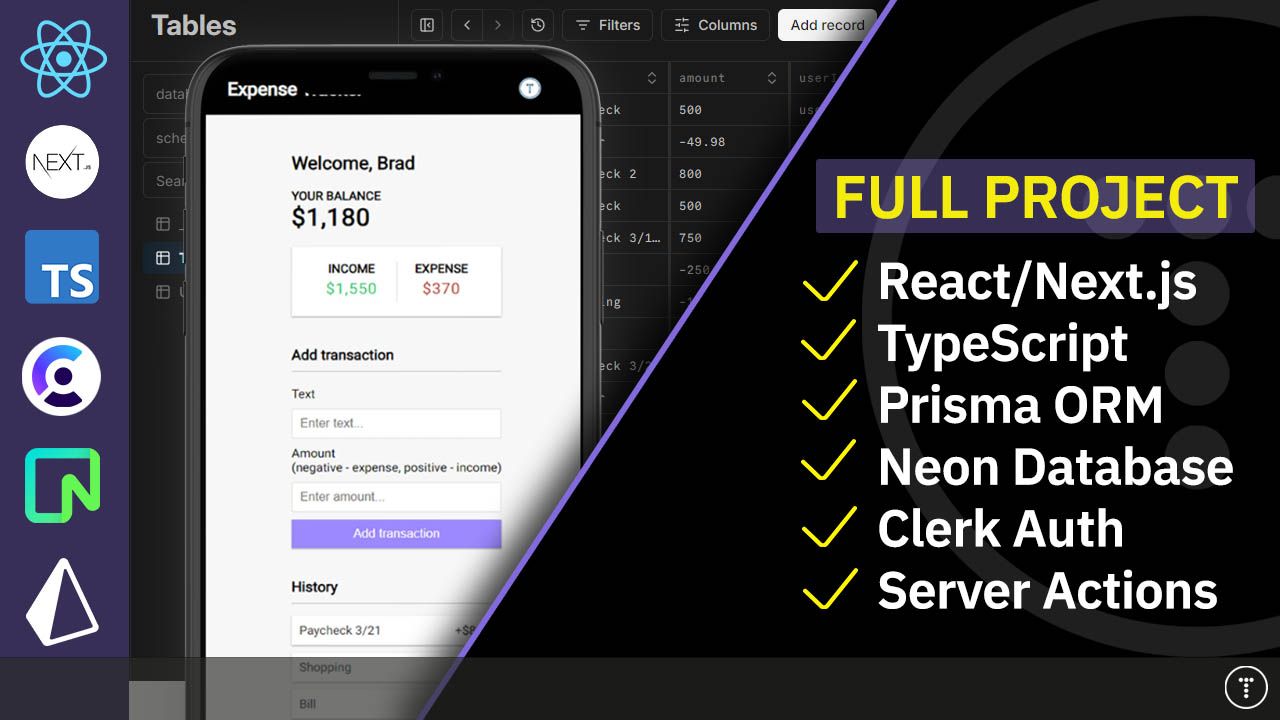
In this project, we will build an app from the ground up to track expenses. We will be using Next.js & TypeScript along with Prisma ORM, Neon, which is a serverless Postgres platform and Clerk for authentication. This is one of my favorite stacks as it is really powerful and it is incredibly easy to get up and going.
Here is what the project will look like:


The final code for this project can be found here
You can also watch the YouTube tutorial here
Project Setup
Let's start by creating a new Next.js application. Open a terminal and run the following command:
npx create-next-app@latest expense-tracker-nextjs
I am not going to use Tailwind. We will just use a pre-defined CSS stylesheet as I don't want to focus on styling. We will use TypeScript in this project but you don't have to. We are really only using it for component props.
Let's clean up a bit by clearing the homepage file - app/page.tsx:
export default function Home( ) {
  return (
    <main>
      <h1>Expense Tracker</h1>
    </main>
  );
}
Delete the page.module.css file and add the default styles to the globals.css file. You can find the CSS in the final repo for this project.
I also want to use the Roboto font. So let's add that in the app/layout.tsx file:
import type { Metadata } from 'next';
import { Roboto } from 'next/font/google';
import './globals.css';

const roboto = Roboto({
  weight: '400',
  subsets: ['latin'],
});

export const metadata: Metadata = {
  title: 'Expense Tracker',
  description: 'Track your expenses and create a budget',
};

export default function RootLayout({
  children,
}: Readonly<{
  children: React.ReactNode;
}>) {
  return (
    <html lang='en'>
      <body className={roboto.className}>
        <main className='container'>{children}</main>
      </body>
    </html>
  );
}
Create A Database With Neon
Before we move on and start coding our project, let's get our database setup. We'll be using Neon, which is a serverless Postgres platform that is free to use and insanely easy to setup. It helps you build reliable and scalable applications faster. It has modern developer features such as autoscaling, branching, point-in-time restore, and more
One of the most unique features is database branching. Just like you can have multiple branches for your code, you can do the same with your data. Every Neon branch has a unique Postgres connection string, so they're completely isolated from one another. You can also use Github actions for creating and deleting branches. I may do a separate video on this later on.
Create Project
Click here to visit the Neon website. You can either sign up for a free account or log in with GitHub. I'm going to log in with my Github. Once you're logged in, you'll be taken to your dashboard.
From there, click on New Project. A project is the top-level container that holds your branches, databases, and roles.


Give it a name and click Create Project.
Branching
Neon has a concept of branching. This allows you to manage your database branches just like you manage your code branches. A default main branch is automatically created for you. Branches are great for development, testing and various other purposes. They improve your productivity and optimize continuous integration and delivery pipelines.
A branch is a copy-on-write clone of your data. You can create a branch from a current or past state. For example, you can create a branch that includes all data up to the current time or an earlier time. A branch is isolated from its originating data, so you are free to play around with it, modify it, or delete it when it's no longer needed.
Create Role
Let's create a role as well. click on Roles under Branch and add a role. I will just call mine "brad". You will be given a password and asked if you want to copy it or download the .env file. I'll just copy it.


Create Database
Now click on Databases on the left under Branch and click New Database.
Give it a name and click Create


We can add data using the SQL Editor option on the left.
We will be using Prisma to generate our tables and data, but just to give you a quick example, let's say we wanted a table called transactions with id, text and amount fields.
CREATE TABLE transactions (
    id SERIAL PRIMARY KEY,
    text TEXT,
    amount varchar(11),
    created_at TIMESTAMP DEFAULT CURRENT_TIMESTAMP
);
We could then insert a few rows of data:
INSERT INTO transactions (text, amount)
VALUES
    ('Paycheck', '500'),
    ('Gasoline refill', '-30'),
    ('Dinner at restaurant', '-100');
Then we could see the data with:
SELECT * FROM transactions;
You can also click on the "Tables" option on the left.
We are not going to use this data, so let's drop the table.
DROP TABLE transactions;
Connecting To Our Database
Now that we have the database created and some sample data, let's connect to the database. We are going to use Prisma as our ORM. Prisma is a modern database toolkit that makes it easy to build and deploy serverless applications. We can create a schema file and use Prisma to generate the client.
Lets install Prisma:
npm i -D prisma
Then we need to initialize Prisma. Run the following command:
npx prisma init
This will add a new folder called prisma with a schema file called schema.prisma. It also adds an environment variable called DATABASE_URL to our .env file. It is just dummy data. We need to replace it with our actual connection string.
Go back to the Neon dashboard and under Connection Details, you should see your string. Copy that and put it into the .env file.
Database Schema
Now we need to create our data schema. Open the schema.prisma file and add the following:
model User {
  id String @id @default(uuid())
  clerkUserId   String   @unique
  email         String   @unique
  name          String?
  imageUrl      String?
  createdAt     DateTime @default(now())
  updatedAt     DateTime @updatedAt
  transactions  Transaction[]
}

model Transaction {
  id            String @id @default(uuid())
  text          String
  amount        Float
  // Relation to user
  userId        String
  user User @relation(fields: [userId], references: [clerkUserId], onDelete: Cascade)
  createdAt     DateTime @default(now())
  @@index([userId])
}
We want a user and transactions collection/tables. Clerk will handle the authentication and storing passwords. We will store the name, email and clerkUserId as well as some other fields. We are also creating a relationship between profiles and transactions.
Prisma Generate Client
Whenever you modify the schema, you need to regenerate the client. Run the following command:
npx prisma generate
Migrations
With Prisma, you can use migrations to create new tables and add fields to existing tables.
Migrations are a way to keep track of changes to your database. You can create migrations to add new tables, add new fields to existing tables, or remove tables and fields.
Here is the basic workflow for creating a new migration:


Run the following command:
npx prisma migrate dev
Now you will see a new migrations file in the migrations folder. You can see that it has created a new table called users and a new table called transactions.
Reset Database
Don't run this, but you can also reset the database to its original state by running the following command:
npx prisma migrate reset # Do not run
This would drop the database/schema and apply all migrations.
Now if you go to your Neon dashboard, and click on "Tables", you will see the fields from our models. Pretty cool right?
Database File
We are going to create a database utility file to interact with our database. Create a new file at lib/db.ts and add the following:
import { PrismaClient } from '@prisma/client';

declare global {
  var prisma: PrismaClient | undefined;
}

// Don't initialize the PrismaClient multiple times in development (hot reloading)
// globalThis is not affected by module reloading
export const db = globalThis.prisma || new PrismaClient();

if (process.env.NODE_ENV !== 'production') {
  globalThis.prisma = db;
}
This code just initializes a new Prisma client.
The declare global block ensures that the prisma variable can be accessed globally within the application.
We are using a bit of a hack here and used the globalThis.prisma to make it so that the Hot Reload that Next offers will not initialize too many clients in development mode. Otherwise, in production mode, it will just initialize the client normally.
Clerk Setup
Authentication is easy using Clerk. It is by far my favorite out of the box solution for authentication. In many cases, there is no need to create auth from scratch. Clerk is extremely flexible with a complete suite of embeddable UIs, flexible APIs and admin dashboards to authenticate and manage users.
Let's install it:
npm install @clerk/nextjs
Create App & Get Key
We need to setup an app and get an API key from Clerk. Go to https://dashboard.clerk.com/apps/new and create a new app.
You can choose the login methods that you want. I am going to select email and Google. Those are the defaults as well.


Then click the Create Application button in the bottom left.
Now copy the .env variables from the Clerk dashboard and paste them into the.env file. They will look like this:
NEXT_PUBLIC_CLERK_PUBLISHABLE_KEY=pk_test_d2VhbHRoeS1yZWRiaXJkLTQ1LmNsZXJrLmFjY291bnRzHjdsiII
CLERK_SECRET_KEY=sk_test_1euPvBA8BHEmNLdskjsdRhYfQ39XJuJFUxqVRUnXFDKVf
Middleware File
Create a file in your root called middleware.ts and add the following:
import { clerkMiddleware } from '@clerk/nextjs/server';

export default clerkMiddleware();

export const config = {
  matcher: ['/((?!.*\\..*|_next).*)', '/', '/(api|trpc)(.*)'],
};
The clerkMiddleware helper enables authentication and is where you'll configure your protected routes.
Add Provider
We need to wrap our project with the Clerk provider in order to use it. Open the app/layout.tsx file and add the following:
import { ClerkProvider } from '@clerk/nextjs';
export default function RootLayout({
  children,
}: Readonly<{
  children: React.ReactNode;
}>) {
  return (
    <ClerkProvider>
      <html lang='en'>
        <body className={roboto.className}>
          <Header />
          <div className='container'>{children}</div>
        </body>
      </html>
    </ClerkProvider>
  );
}
Header & Sign-in
We will create a header component with the sign-in button. Clerk gives us a signIn component that will allow us to log in or sign up.
Create a file at components/Header.tsx and add the following:
import { SignInButton, SignedIn, SignedOut, UserButton } from '@clerk/nextjs';

const Header = () => {
  return (
    <nav className='navbar'>
      <div className='navbar-container'>
        <h2>Expense Tracker</h2>
        <div>
          <SignedOut>
            <SignInButton />
          </SignedOut>
          <SignedIn>
            <UserButton />
          </SignedIn>
        </div>
      </div>
    </nav>
  );
};

export default Header;
Bring it into the app/layout.tsx file and embed it:
import Header from '@/components/Header';

return (
  <html lang='en'>
    <body className={roboto.className}>
      <Header />
      <main className='container'>{children}</main>
    </body>
  </html>
);
Just doing this will give us authentication. Click the button and you will be taken to a page to log in or sign up.


Once you log in, you will see your avatar in the header and a dropdown with options for profile and sign out.


Clerk Dashboard
Now that you have authentication working, you can log into your Clerk dashboard and you can see the users that have signed up.


Save User To Database
We want to save the user to our database when they sign up. There are many ways that we can do this. We could setup a webhook to run a function when a user is created. That takes som extra work though because we would need our app publically accessible, so since we are working locally, we would need to use something like ngrok. This is initially how I was going to do it, but I figured a lot of you guys would run into issues with your firewall and you'd have to open some ports and it would just be a mess.
So all we're going to do is have a utility that will check the database for the user and if they don't exist, we will create them.
Create a file in lib/checkUser.ts and add the following:
import { currentUser } from '@clerk/nextjs/server';

import { db } from '@/lib/db';

export const checkUser = async () => {
  const user = await currentUser();

  // Check for current clerk user
  if (!user) {
    return null;
  }

  // Check if user is already in the database
  const loggedInUser = await db.user.findUnique({
    where: {
      clerkUserId: user.id,
    },
  });

  // If user is in the database, return the user
  if (loggedInUser) {
    return loggedInUser;
  }

  // If user is not in the database, create a new user
  const newUser = await db.user.create({
    data: {
      clerkUserId: user.id,
      name: `${user.firstName} ${user.lastName}`,
      // @ts-ignore
      imageUrl: user.imageUrl,
      email: user.emailAddresses[0].emailAddress,
    },
  });

  return newUser;
};
Here, we are bringing in the database and the current logged in user from Clerk. We are then checking if the user exists in the database. If they do, we return the user. If they don't, we create a new user and return that.
Let's bring this file into the components/Header.tsx file and run the function. It is async, so we need to make sure we make the header an async function.
import { SignInButton, SignedIn, SignedOut, UserButton } from '@clerk/nextjs';
import { checkUser } from '@/lib/checkUser';

const Header = async () => {
  const user = await checkUser();

  return (
    <nav className='navbar'>
      <div className='navbar-container'>
        <h2>Expense Tracker</h2>
        <div>
          <SignedOut>
            <SignInButton />
          </SignedOut>
          <SignedIn>
            <UserButton />
          </SignedIn>
        </div>
      </div>
    </nav>
  );
};

export default Header;
Now log in and you should see the user in the database.


Guest Component
If a user is not logged in, we want them to just see a message telling them to log in.
Create a file at components/Guest.tsx and add the following:
import { SignInButton } from '@clerk/nextjs';

const Guest = () => {
  return (
    <div className='guest'>
      <h1>Welcome</h1>
      <p>Please sign in to manage your expenses</p>
      <SignInButton />
    </div>
  );
};

export default Guest;
Now we only want to show this when not logged in. Add the following to the app/page.tsx file:
import AddTransaction from '@/components/AddTransaction';
import Guest from '@/components/Guest';
import { currentUser } from '@clerk/nextjs/server';

export default async function Home( ) {
  const user = await currentUser();

  if (!user) {
    return <Guest />;
  }

  return (
    <main>
      <h2>Welcome, {user.firstName}!</h2>
    </main>
  );
}
You should now see the guest component when logged out and a welcome message when logged in.


Add Transaction Component
Now, let's create a file at components/AddTransaction.tsx and add the following:
'use client';

import addTransaction from '@/app/actions/addTransaction';

const AddTransaction = () => {
  const clientAction = async (formData: FormData) => {
    console.log(formData.get('text'), formData.get('amount'));
  };

  return (
    <>
      <h3>Add new transaction</h3>
      <form action={clientAction}>
        <div className='form-control'>
          <label htmlFor='text'>Text</label>
          <input type='text' name='text' placeholder='Enter text...' />
        </div>
        <div className='form-control'>
          <label htmlFor='amount'>
            Amount <br />
            (negative - expense, positive - income)
          </label>
          <input
            type='number'
            name='amount'
            placeholder='Enter amount...'
            step='0.01'
          />
        </div>
        <button className='btn'>Add transaction</button>
      </form>
    </>
  );
};

export default AddTransaction;
Here we have a form and we are using a client action. When we actually submit our data to the database, it will be in a server action, however, I want to be able to add some validation and error handling, so we will call the server action from the client action.
Add Transaction Action
Let's create the server action file at app/actions/addTransaction.ts and add the following for now:
'use server';

interface TransactionData {
  text: string;
  amount: number;
}

interface TransactionResult {
  data?: TransactionData;
  error?: string;
}

async function addTransaction(formData: FormData): Promise<TransactionResult> {
  const textValue = formData.get('text');
  const amountValue = formData.get('amount');

  // Check for input values
  if (!textValue || textValue === '' || !amountValue) {
    return { error: 'Text or amount is missing' };
  }

  const text: string = textValue.toString(); // Ensure text is a string
  const amount: number = parseFloat(amountValue.toString()); // Parse amount as a number

  const transactionData: TransactionData = {
    text,
    amount,
  };

  return { data: transactionData };
}

export default addTransaction;
Here, we are just getting the form data and checking if the text and amount are there. We are then parsing the amount as a number and returning the data. The return will either be the data or an error message.
Now, back in the AddTransaction.tsx file, we need to call the server action.
const AddTransaction = () => {
  const clientAction = async (formData: FormData) => {
    const result = await addTransaction(formData);
    if (result.error) {
      alert(result.error);
    } else {
      alert('Transaction added');
      console.log(result.data)
    }
  };
Now, when you submit the form, you should see an alert with the data or an error message.
Getting The User
We also need to get the user in the server action. We can bring in auth from clerk and get the user ID from there.
'use server';

import { auth } from '@clerk/nextjs/server';

interface TransactionData {
  text: string;
  amount: number;
  userId: string;
}

interface TransactionResult {
  data?: TransactionData;
  error?: string;
}

async function addTransaction(formData: FormData): Promise<TransactionResult> {
  const textValue = formData.get('text');
  const amountValue = formData.get('amount');

  // Check for input values
  if (!textValue || textValue === '' || !amountValue) {
    return { error: 'Text or amount is missing' };
  }

  const text: string = textValue.toString(); // Ensure text is a string
  const amount: number = parseFloat(amountValue.toString()); // Parse amount as a number

  // Get logged in user
  const { userId } = await auth();

  // Check for user
  if (!userId) {
    return { error: 'User not found' };
  }

  const transactionData: TransactionData = {
    text,
    amount,
    userId,
  };

  return { data: transactionData };
}

export default addTransaction;
Now you should see the user in the result.
Adding A Toast Component
Instead of showing the error in an alert like it's 1999, let's use a toast component. We will use the react-toastify package.
npm install react-toastify
In the app/layout.tsx file, add the following:
import { ToastContainer } from 'react-toastify';
import 'react-toastify/dist/ReactToastify.css';
return (
  <ClerkProvider>
    <html lang='en'>
      <body className={roboto.className}>
        <Header />
        <div className='container'>{children}</div>
        <ToastContainer />
      </body>
    </html>
  </ClerkProvider>
);
Now in the AddTransaction.tsx file, we can import the toast component and use it.
import { toast } from 'react-toastify';
if (result.error) {
  toast.error(result.error);
} else {
  console.log(result.data);
}
Now you should see a nice toast message.
Add Transaction To Database
Now we need to add the transaction to the database. We can do this in the server action file app/actions/addTransaction.ts.
Import the database as well as revalidatePath. This will allow us to revalidate the path and force a refresh.
import { db } from '@/lib/db';
import { revalidatePath } from 'next/cache';
Then replace the data return at the bottom with the following:
try {
    const transactionData: TransactionData = await db.transaction.create({
      data: {
        text,
        amount,
        userId,
      },
    });

    revalidatePath('/');

    return { data: transactionData };
  } catch (error) {
    return { error: 'Transaction not added' };
  }
That's it! now you should be able to add a transaction. You won't see it in the app yet, but you will see it in the database.
Reset Form
We want the inputs to clear after submission. We can do that by using the useRef hook.
import { useRef } from 'react';
const AddTransaction = () => {
  const router = useRouter();
  const formRef = useRef<HTMLFormElement>(null); // Add this line
  // ...
};
Add the ref to the form:
<form ref={formRef} action={clientAction}>
Clear the form:
if (result.error) {
  toast.error(result.error);
} else if (result.data) {
  toast.success('Transaction added');
  router.refresh();
  formRef.current?.reset(); // Add this line
}
Now both inputs should clear on submit.
Balance Component
Let's create a balance component that will show the total balance. Create a file at components/Balance.tsx and add the following:
import { getUserBalance } from '@/app/actions/getUserBalance';

const Balance = async () => {
  const { balance } = await getUserBalance();

  return (
    <>
      <h4>Your Balance</h4>
      <h1>${balance}</h1>
    </>
  );
};

export default Balance;
We are getting the balance from an action file.
Now we need to create the getUserBalance action. Create a file at app/actions/getUserBalance.ts and add the following:
'use server';
import { db } from '@/lib/db';
import { auth } from '@clerk/nextjs/server';

export async function getUserBalance( ): Promise<{
  balance?: number;
  error?: string;
}> {
  const { userId } = await auth();

  if (!userId) {
    return { error: 'User not found' };
  }

  try {
    const transactions = await db.transaction.findMany({
      where: { userId },
    });

    const balance = transactions.reduce(
      (sum, transaction) => sum + transaction.amount,
      0
    );
    return { balance };
  } catch (error) {
    return { error: 'Database error' };
  }
}
Here, we are getting the user and then getting all the transactions for the user. Then we are reducing the transactions to get the balance.
Now bring the balance component into the app/page.tsx file:
import Balance from '@/components/Balance';
Add the balance component to the page:
return (
  <main>
    <h2>Welcome, {user.firstName}!</h2>
    <Balance />
    <AddTransaction />
  </main>
);
Income/Expense Component
We will now add a component that will show the total income and expenses. Create a file at components/IncomeExpense.tsx and add the following:
const IncomeExpense = async () => {
  return (
    <div className='inc-exp-container'>
      <div>
        <h4>Income</h4>
        <p className='money plus'>$700</p>
      </div>
      <div>
        <h4>Expense</h4>
        <p className='money minus'>$200</p>
      </div>
    </div>
  );
};

export default IncomeExpense;
We are just hardcoding the numbers for now.
Import the component into the app/page.tsx file:
import IncomeExpense from '@/components/IncomeExpense';
Add the component to the page:
return (
  <main>
    <h2>Welcome, {user.firstName}!</h2>
    <Balance />
    <IncomeExpense />
    <AddTransaction />
  </main>
);
Now we need to create an action file at app/actions/getIncomeExpense.ts and add the following:
'use server';
import { db } from '@/lib/db';
import { auth } from '@clerk/nextjs/server';

export async function getIncomeExpense( ): Promise<{
  income?: number;
  expense?: number;
  error?: string;
}> {
  const { userId } = await auth();

  if (!userId) {
    return { error: 'User not found' };
  }

  try {
    const transactions = await db.transaction.findMany({
      where: { userId },
    });

    const amounts = transactions.map((transaction) => transaction.amount);

    const income = amounts
      .filter((item) => item > 0)
      .reduce((acc, item) => acc + item, 0);

    const expense = amounts
      .filter((item) => item < 0)
      .reduce((acc, item) => acc + item, 0);

    return { income, expense: Math.abs(expense) };
  } catch (error) {
    return { error: 'Database error' };
  }
}
We are getting the user and then getting all the transactions for the user. Then we are reducing the transactions to get the income as well as the expenses.
Now use the action in the components/IncomeExpense.tsx file:
import { getIncomeExpense } from '@/app/actions/getIncomeExpense';

const IncomeExpense = async () => {
  const { income, expense } = await getIncomeExpense();
  return (
    <div className='inc-exp-container'>
      <div>
        <h4>Income</h4>
        <p className='money plus'>${income}</p>
      </div>
      <div>
        <h4>Expense</h4>
        <p className='money minus'>${expense}</p>
      </div>
    </div>
  );
};

export default IncomeExpense;
Now it should reflect the actual income and expenses.


List Transactions
We will now add a list of transactions to the page. Create a file at components/TransactionList.tsx and add the following:
import { getTransactions } from '@/app/actions/getTransactions';
import { Transaction } from '@/types/Transaction';

const TransactionList = async () => {
  const { transactions, error } = await getTransactions();

  if (error) {
    return <p className='error'>{error}</p>;
  }

  return (
    <>
      {' '}
      <h3>History</h3>
      <ul className='list'>
        {transactions &&
          transactions.map((transaction: Transaction) => (
            <p>{transaction.text}</p>
          ))}
      </ul>
    </>
  );
};

export default TransactionList;
Bring the component into the app/page.tsx file:
import TransactionList from '@/components/TransactionList';
Embed it in the output:
return (
  <main>
    <h2>Welcome, {user.firstName}!</h2>
    <Balance />
    <IncomeExpense />
    <AddTransaction />
    <TransactionList />
  </main>
);
This will break because we need to add a few more things.
Transaction Type
Let's create the type file for transactions. Create a file at types/Transaction.ts and add the following:
export interface Transaction {
  id: string;
  text: string;
  amount: number;
  userId: string;
  createdAt: Date;
}
Get Transactions Action
Now, create the action file at app/actions/getTransactions.ts and add the following:
'use server';
import { db } from '@/lib/db';
import { auth } from '@clerk/nextjs/server';
import { Transaction } from '@/types/Transaction';

export async function getTransactions( ): Promise<{
  transactions?: Transaction[];
  error?: string;
}> {
  const { userId } = await auth();

  if (!userId) {
    return { error: 'User not found' };
  }

  try {
    const transactions = await db.transaction.findMany({
      where: { userId },
      orderBy: {
        createdAt: 'desc',
      },
    });

    return { transactions };
  } catch (error) {
    return { error: 'Error getting transactions' };
  }
}
We are getting the user and then getting all the transactions for the user.
TransactionItem Component
Now you should see just the text of the transaction in a paragraph. Now we will create the TransactionItem component that will show the text and amount.
Create a file at components/TransactionItem.tsx and add the following:
import { Transaction } from '@/types/Transaction';

const TransactionItem = ({ transaction }: { transaction: Transaction }) => {
  const sign = transaction.amount < 0 ? '-' : '+';

  return (
    <li className={transaction.amount < 0 ? 'minus' : 'plus'}>
      {transaction.text}{' '}
      <span>
        {sign}${Math.abs(transaction.amount)}
      </span>
      <button className='delete-btn'>x</button>
    </li>
  );
};

export default TransactionItem;
We are getting the sign and then using the sign to determine the class name for the transaction item. We are also using the Math.abs to get the absolute value of the amount. We will add the delete button functionality in a little bit.
Bring the component into the components/TransactionList.tsx file:
import TransactionItem from './TransactionItem';
Add it in the list and pass the transaction id and data:
return (
  <>
    {' '}
    <h3>History</h3>
    <ul className='list'>
      {transactions &&
        transactions.map((transaction: Transaction) => (
          <TransactionItem key={transaction.id} transaction={transaction} />
        ))}
    </ul>
  </>
);
Now you should see the transaction text and amount.


Add Commas
Let's add commas to the amounts that are in the thousands. Create a file at lib/utils.ts and add the following:
export function numberWithCommas(x: number) {
  return x.toString().replace(/\B(?=(\d{3})+(?!\d))/g, ',');
}
Let's bring it into the Balance.tsx component first:
import { numberWithCommas } from '@/lib/utils';
<h1>${numberWithCommas(balance ?? 0)}</h1>
We are wrapping the ballance and using the ?? 0 to set the default value and fallback to 0.
Bring it into the IncomeExpense.tsx component and use it here:
return (
  <div className='inc-exp-container'>
    <div>
      <h4>Income</h4>
      <p className='money plus'>${numberWithCommas(income ?? 0)}</p>
    </div>
    <div>
      <h4>Expense</h4>
      <p className='money minus'>${numberWithCommas(expense ?? 0)}</p>
    </div>
  </div>
);
Now use it in the TransactionItem.tsx component:
return (
  <li className={transaction.amount < 0 ? 'minus' : 'plus'}>
    {transaction.text} {' '}
    <span>
      {sign}${numberWithCommas(Math.abs(transaction.amount))}
    </span>
    <button className='delete-btn'>x</button>
  </li>
);
Now you should see the commas in the numbers.
Delete Transaction
Now let's add a delete button to delete a transaction. We will create an action file at app/actions/deleteTransaction.ts and add the following:
'use server';
import { db } from '@/lib/db';
import { auth } from '@clerk/nextjs/server';
import { revalidatePath } from 'next/cache';

export async function deleteTransaction(transactionId: string): Promise<{
  message?: string;
  error?: string;
}> {
  const { userId } = await auth();

  if (!userId) {
    return { error: 'User not found' };
  }

  try {
    await db.transaction.delete({
      where: {
        id: transactionId,
        userId,
      },
    });

    revalidatePath('/');

    return { message: 'Transaction deleted' };
  } catch (error) {
    return { error: 'Error deleting transactions' };
  }
}
We are getting the user and then deleting the transaction. We are also revalidating the path so that the page is refreshed.
Now we need to bring this action and the toast into the TransactionItem.tsx file. We also need to make it a client component since we will have an event handler on the button.
'use client';
import { toast } from 'react-toastify';
import { deleteTransaction } from '@/app/actions/deleteTransaction';
Add an event handler to the button:
<button
  onClick={() => handleDeleteTransaction(transaction.id)}
  className='delete-btn'
>
  x
</button>
Create the function to handle the delete transaction inside the TransactionItem function:
const handleDeleteTransaction = async (transactionId: string) => {
  const confirmed = window.confirm(
    'Are you sure you want to delete this transaction?'
  );

  if (!confirmed) return;

  await deleteTransaction(transactionId);

  toast.success('Transaction Deleted');
};
That's it, you should now be able to delete a transaction.
That does it for this project. Hopefully you found it useful and you can continue creating your own applications using Next.js, Neon and Clerk.
Stay connected with news and updates!
Join our mailing list to receive the latest news and updates from our team.
Don't worry, your information will not be shared.
We hate SPAM. We will never sell your information, for any reason.
